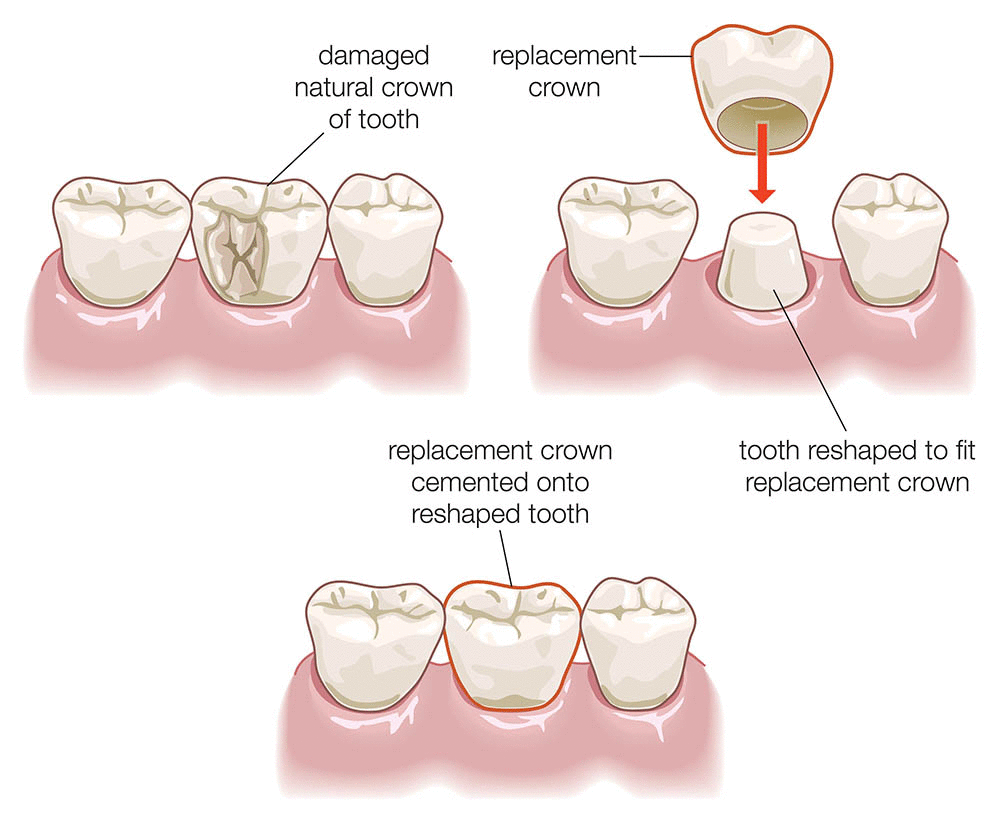
Crown preparation refers to the process of shaping a tooth to receive a dental crown. This procedure is typically performed by a dentist when a tooth is too damaged, decayed, or weakened to function properly, but still has enough healthy structure left to support a crown. Here’s a basic outline of the steps involved in crown preparation:
1. Initial Evaluation and Planning
- The dentist will examine the tooth and surrounding structures (using X-rays if necessary).
- A treatment plan is made, including selecting the type of crown (e.g., metal, porcelain, or a combination).
2. Tooth Reduction
- The tooth is trimmed down to create space for the crown. The amount of reduction depends on the type of crown and the tooth’s condition.
- Typically, the dentist reduces the tooth’s height and width. The goal is to leave enough healthy tooth structure to support the crown.
3. Shaping the Tooth
- After reducing the tooth, the dentist refines the shape to make it suitable for the crown. The shape should ensure that the crown fits snugly and securely over the tooth.
- The dentist may also smooth any rough edges.
4. Taking Impressions
- An impression (mold) of the prepared tooth is taken, usually with a special material or digital scanning. This impression will be used to create a custom crown that fits perfectly.
- A temporary crown may be placed to protect the tooth while the permanent one is being fabricated.
5. Crown Fabrication
- The impressions are sent to a dental laboratory where the permanent crown is made. Depending on the type of crown, this can take anywhere from a few days to a couple of weeks.
6. Crown Placement
- Once the permanent crown is ready, the dentist will remove the temporary one and fit the permanent crown over the prepared tooth. Adjustments are made for fit, comfort, and appearance.
- Once everything fits properly, the crown is cemented into place.
Crown preparation is a precise process that ensures the final restoration is both functional and aesthetic.
